The post you have all been waiting for……..
The question I get asked most frequently is, “how do you make your hummus?” Until now, there was no simple answer. Sometimes the chickpeas were from a can, sometimes they were cooked from scratch. Sometimes I used tahini, sometimes I didn’t. My ‘recipe’ was a constantly evolving concept. My approach to cooking is usually: use what is available and make it as healthy and tasty as possible! This works great – except it’s hard to share a specific recipe.
So…. this week I pulled out my measuring spoons, practiced making 6 batches of hummus and created a basic template that could be personalized by each chef. In the paragraphs that follow I will explain the role of each ingredient, discuss alterations that can be made, and offer insights on how you can adapt it to your taste buds to create your own hummus that will leave guests asking you, “how do you make your hummus?!”
***For the full recipe, go to the “Recipes” tab on my website and click on “Heather’s FAMOUS Hummus!”
The Elements for Success:
- The chickpeas
- The olive oil
- The tahini
- The garlic
- The lemon juice
- The salt
- The cumin & spices
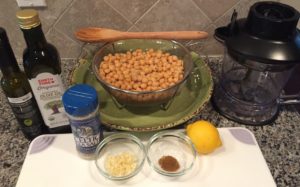
(1) The Chickpeas:
As I mentioned earlier, these can be canned or cooked from dried beans. If you are buying canned, opt for low-sodium. You will add your own salt later in the recipe according to taste, and your salt will make it taste fresher than the stuff sitting in the can for a few months. Also, read the label. You will be surprised what hidden preservatives lurk in canned beans (disodium EDTA, etc). Look for organic if possible to reduce these chemicals.
If cooking your own, buy dried beans in bulk (this is VERY cost-effective and CHEAP!) Soak the beans overnight, or about 6-8 hours in a large bowl (they will triple in size). Drain and rinse the beans thoroughly. Gently simmer on the stove for about an hour and a half, or until the beans are tender. Use a spoon to skim off the foam that initially appears. You may add fresh herbs or a bay leaf to the cooking water to infuse an amazing flavor but do not add salt or an acid (lemon juice or vinegar) until the very end because this will make them very tough. Taste one or two at a time to test doneness. They should be tender but not disintegrating. You may add some salt during the last 15 minutes of cooking if desired.

(2) The olive oil
I have two main points to make.
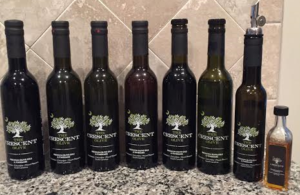
One: the flavor and quality of the olive oil has a huge impact on the flavor and quality of the hummus. Do not underestimate the olive oil. I get so many compliments because I invest in very high-quality olive oil. (I have actually tested this theory.) The Crescent Olive is a store in Columbia and Mount Pleasant, South Carolina that features over 60 unique and unsurpassed extra virgin olive oils and aged balsamic vinegars on tap. The olive oils are sourced from countries all over the world, with the “crush date” on every bottle they sell. They have light, medium, and robust- bodied olive oils, as well as flavor-infused olive oils that impart an incredible flavor to every dish.
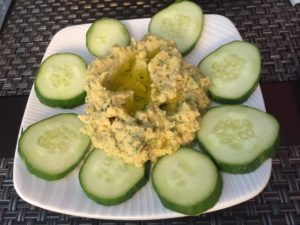
Two: don’t overdo the olive oil in the base of the hummus, as it will make it very heavy. Also, if you are using a very high-quality olive oil it will impart plenty of olive-y flavor in small quantities. Instead, I like to generously drizzle on top of the finished product to serve as a beautiful garnish which provides a silky, smooth mouth-feel to each bite that is sure to impress and intrigue any hummus connoisseur.
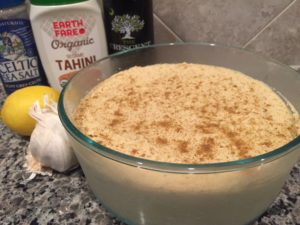
(3) The tahini
Tahini is roasted and pureed sesame seeds. It imparts a nutty, smooth texture to hummus. Without tahini, the hummus can be bland, gritty, and less full-bodied. Like the olive oil, a little bit goes a long way. When buying tahini, quality matters here too. Look for a fresh batch and go organic if possible. Tahini is refrigerated after opening and can last for several months if stored properly so spend the money up front ($6-10) and enjoy for months at a time!
(4) The garlic
There are a few options here: fresh cloves, ground garlic, and pre-cut garlic. I will be honest and say that the fresh cloves really makes a difference. If you buy a head of garlic and always keep it on hand, it makes it so much easier. One important point: you must mince it tiny because you do not want a mouthful of hummus and have to chew a piece of pungent garlic. When mincing with a knife, sprinkle some salt on the garlic to help the cell walls break down and release its water content.
Of course you can also use the pre-cut garlic or ground garlic. I’d start with 1/4 or 1/8 tsp of ground garlic and add more only if needed. You don’t want to specifically taste the garlic – it just balances the flavors of the whole recipe.

(5) The lemon juice
Lemon juice is the acidic ingredient which balances the rich, fatty, and salty components for a satisfying and balanced palate. Fresh-squeezed or from a bottle. Both are good, but of course the fresh juice tastes a little bit brighter. If you use lemon juice from a bottle, use not-from-concentrate, no added ingredients, and organic if possible.
***If you do not have lemon juice or prefer a different flavor, a splash of vinegar (rice vinegar, white wine vinegar) could be used instead as the acidic base to balance the flavors of the hummus.
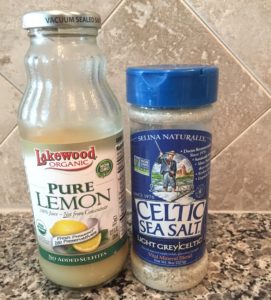
(6) The salt
What is the difference between table salt and sea salt? Table salt is chemically stripped of its nutrients and has iodine added. Sea salt has all of its natural nutrients and minerals intact. Sea salt has a much bolder and more balanced flavor, in addition to lots of trace minerals that, when consumed over time, really add up! Add a little bit at first and only add more if needed. Sea salt has a stronger flavor so use it sparingly!
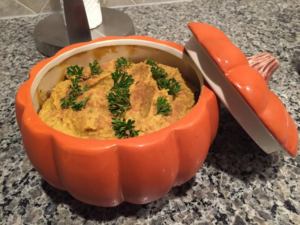
(7) The cumin & spices
Cumin is a very common spice to add to hummus. Other possibilities are parsley, coriander, cayenne, or curry powder. The possibilities are endless!
Important recipe notes:
- When blending the hummus, my most important piece of advice is: water makes the hummus creamier and lighter. Add a tablespoon at a time.
- The hummus tastes amazing as soon as you mix it BUT after it marinates for 24 hours…. MMMM! If you are making hummus to take to an event, make it the day before, let it marinate in the refrigerator, and immediately before serving, sprinkle with spices, top with generous olive oil, and you have created your very own MASTERPIECE!
Serve with pretzels, pita chips, rice cakes, bell peppers, cucumbers, or carrots!


Heather!!! You are amazing! Thank you for (finally) sharing your hummus, those of us who have had the privilege of tasting your hummus know that you are sharing a special gift. Thank you !
Thank you so much, Michele! That means so much to me…. if you have any tips or recommendations as you experiment with your own take on hummus, feel free to share! And as always, any time you want a sample, I always have more than enough to share 😉